Sunday, June 17, 2012

What’s better than Apple’s Siri? Android’s Tap & Speak, that’s what.

It might be old news to some of you but for me, since I’m still discovering Android’s awesomeness, Vlingo’s Tap & Speak is a Siri killer. I wish Vlingo would port Tap & Speak to the iPhone. I’d pay $4.99 for it. I might pay more. I’d pay something to have a productive App like that at my disposal. Tap & Speak has a very cool ‘Driving Mode’ which allows you to use your phone for calling and texting without having to wreck your car to do it. Hands down (pardon the pun), Tap & Speak is way better than Siri.

Watching my wife get frustrated enough with Siri to fling her new iPhone 4S across the room and yell, “Siri is useless!” is enough to make me realize that I don’t need or want Siri. I have an iPhone 4, so I don’t have a choice but even if I did, I wouldn’t use it. I’m sure some people find it useful and helpful but I’m not one of them. Neither is my wife. Our 18-year-old son doesn’t use Siri on his 4S either. I believe he colorfully compared Siri’s usefulness to the operational nature of a vacuum cleaner.

I don’t think Siri is necessarily bad but I do think it requires some training and practice but there are no help files nor is there a website that helps train users how to better use it. And, before you give me that whole, “Apple is intuitive” thing, let me say that Siri is not your typical intuitive Apple application nor is it intuitive.

Tap & Speak gives me examples and a step-by-step how-to on first use. I like that. I also like that I can tap or just say, “Hi Galaxy” to begin a new conversation. No, Tap & Speak isn’t perfect but it’s a level above Siri. I can actually be productive with Tap & Speak. Siri is cute but virtually useless for me–the few times I’ve used it, that is.

Don’t get me wrong. I’m a big Apple device fan. In fact, if you’ve read this blog from the beginning, I didn’t want an Android device. At all. It was thrust upon me. But, the longer I use it, the better I like it. It has some really cool features that I wish my iPhone 4 had. One is the ability to connect to the device’s lower level self. With my Android phone, I can SSH to it from another computer or open a console to the OS from the device itself.

OK, not everyone needs to do that but I rather like having that feature. I don’t want to even think of jailbreaking a device just to get some “should be included from the factory” features.

I’m especially excited by Vlingo’s merger with Nuance. If you don’t know, Nuance is the company that makes Dragon Naturally Speaking software, which is the best speech recognition software on the market. I foresee a truly intelligent conversational device control coming soon to just about everything near you.

With the blend of those two intelligent speech recognition software companies on the same team, I think we’ll soon be able to actively navigate to addresses in our cars, make and receive phone calls, send and receive text messages and do all sorts of SciFi-type things using voice recognition. With superior voice recognition and communications plus Google Car type self-driving cars, even the visually impaired will be able to drive a car. These are exciting times.

You might find it somewhat of a stretch from making a phone call to driving a car but that’s just the way my mind works. Too bad I don’t get paid to come up with ideas and solutions for new products. I’d really like that gig. Heck, I came up with the idea of a self-driving car when I was a kid. I knew it could be done and I knew how to do it but convincing anyone to listen was the hard part. Now, with Siri and and Tap & Speak, I have a built-in audience for my ideas, my jokes and my disruptive dialog.
The best part is that, so far unlike their human counterparts, they just have to listen.

Friday, June 15, 2012

3 Free domain name websites : Advantages and Disadvantages

It is a well known fact that a Domain Name adds a profession touch to your website/brand. But, it is sometimes a case of financial crisis or some other problem that a web publisher is not able to purchase a Generic Top-Level Domain for his brand or Website in general.
In such cases a need for free Domain names is required. So, I am going to tell you about three Services which allow you to register a Domain name for free. I mentioned above that these services will allow you to register a Domain name for free, but another bonus is that they will also allow you to manage your DNS entries like CNAME, A, MX, NS records for free! Now I will describe the benefits and Demerits of each of these service for you to decide which one is the Best suited for you.


CO.CC Advantages:
  • Zero Renewal fees for Personal Domain names
  • Allows registrations of two domain names for free
  • Web forwarding facility available
  • If you donate to co.cc, you can register 100 more free domains in your account
  • You can earn money by referrals
CO.CC Disadvantages:
  • If you place Ads on the Domain name, then you have to pay 3$ as renewal fee of the Domain name every year. If you don’t pay the required amount then your Domain name will be deleted
  • The domain name will be suspended without notice if it contains any illegal/ spam/ adult material
  • Not all the Domain names are free to register. Some domain names need you to pay a small amount to register
  • You need to Set-Up your Domain name before 48 hours of Registering, else it will be deleted
CO.TV Advantages:
  • Allows registrations of three domain names for free
  • Web Forwarding Facility available
  • Site Builder functionality available
CO.TV Disadvantages:
  • Domain name is registered only for one Year. You need to re-register it after one-year.
  • Registering a Premium Domain name costs you 199$ flat.[Premium domain names are usually keywords which are short, can easily be remembered, has multiple meanings or generic quality names]
  • The domain name will be suspended if any violent/ humiliating/ illegal/ spam/ ad*lt material is hosted on it
  • You need to Set-Up your Domain name before 24 hours of Registering, else it will be deleted
  • No referral system for earning through affiliates
  • They can Anytime convert any free services to paid services, remove a part or all of the services temporarily or permanently
UNI.CC Advantages:
  • Domain name is registered for Life-Time. Forget about renewals!
UNI.CC Disadvantages:
  • Only one domain name can be registered per IP Address
  • UNI.CC might serve Advertisements on your website (in some cases)
  • Your Domain name will be deleted without notice if you don’t get more than 10 Hits in 3 months duration
  • Domain name is deleted if any defamatory, inaccurate, abusive, obscene, infringing, or threatening content is hosted on it
  • Members need to pay a small maintenance fee to keep their sites free of banner Ads
  • You cannot manage CNAME entries in your DNS settings
Even though there are many more services like these ones, most of them are spam sites. Keep in mind that these services allow you to Manage your Domain names completely by giving access to DNS setting and these services are completely different from URL redirection services.

How To Get Free .com Domain Under Yourname.com


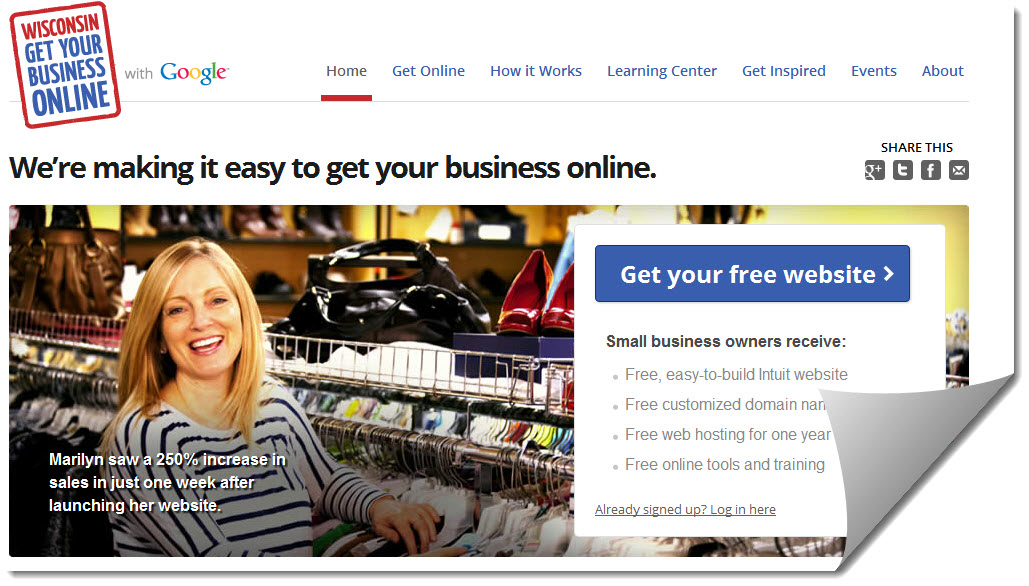
Recently Google have launched Wisconsin Get Your Business Online Program . Wisconsin Get Your Business Online is designed to make it easy, free and fast for any business to get online. Any small business program with small and limited resources and products can now get their business online with the world within few minutes for free. Yes you got it right , you are going to bring your business online for free.
You don’t have to pay anything for this. It is provided by Google. Google partnered with Intuit Company, the Association of Small Business Development Centers, SCORE, and Meetup and they are hosting for free to help small business owners to to get started with their own basic .com website. The project is launched as WisconsinGetOnline (Wisconsin Get Your Business Online). This is a free program from Google. You can get signup for it from any country and get your business online easily and fast.
They are providing following things with free.com domain :
  • Free, easy-to-build Intuit website
  • Free customized domain name
  • Free web hosting for one year
  • Free online tools and training
  • A free customized domain name and hosting
  • $75 in Google AdWords credit
After reading about information and the features provided by it , you might be interested to get your own free.com domain. So now I am going to show you how to get your .com domain for free.  Let’s begin the process.

Easy way to get Free .com Domain name registration for 1 year :

  • At first you need to Go to Wisconsin homepage via this link and there you need to click on GET YOUR FREE WEBSITE button.
  • Now you need to Sign up for your free Intuit website. Then you will get following screen.
Free Intuit Website

  • If you have Google account then you can sign in with it else sign up for a Google account and then sign in with that account.
  • Allow access to it and then click on Continue button.
  • Next you need to you intuit websites password. Fill the details and accept term and conditions and click on continue button.
Domain for Free


  • Then you will be redirected to Intuit Website to register a free .com domain name. Click continue as shown in the above screenshot. Then you will get the following screen.
Getting started


It contains three steps. Select first one i.e – Choose a domain (www.yourname.com) for your website. You will get the following screen. If you are not sure, what domain name you should buy, I suggest you to read how to select great domain name for business & 5 domain name suggestion tools.
 Get a Free Domain Name

 Since you are registering a new domain name so , make sure that the domain name you are going to register is available. You can do this by entering your desired domain name under “Get a New Domain” and clicking on Check Availability  button. If it is available then you will be presented with following screen.
 Domain center

Now all you need to do it click on Get Domain button. Then you will be asked to enter your contact information as shown in the belwo screenshot.


domain contact Info

Enter your contact information and click on Save & Continue button. Then you will be ask to review your information. Review it , agree to the terms of service and  click on submit button.  Note : You must uncheck the Yes (Recommended) option for domain privacy because if you check it you have to pay $1 per month.
As soon as you submit it for review you will get a pop up page asking for your Billing Information. They are asking this to protect against fraudulent activities. Though your website and .com domain name are free but they still need your billing information. Enter your address details and debit/credit card information in this page. Now the real problem comes. Many of us don’t have a real debit/credit card, so to solve this problem you need to create a virtual visa credit card. You can create a virtual visa from Entropay.com. Note : You can also use other websites to create virtual visa. If you don’t want to create virtual visa then use the following virtual visa details to fill the payment options and you will be able to purchase your domain for free.
  • Name on card : Jackie Chan
  • Card type : Visa
  • Credit card number : 4067424695632061
  • Expiration date : 12-2012
  • Card security number : 279
 Test Credit Card

Now just enter your virtual visa details in the payment page and click on purchase button. Now you have successfully created your website with a free .com domain name registration. It may take an hour to activate. After it is activated, you can use their website builder to create a new website or just change the name servers by going in the domain manager to use with other webhost.
I hope this tip would help you to save some money and increase your online presence. If you find this post useful, don’t forget to share it on Google plus and Facebook.

Why to choose a SEO Website Design for blogs?


When you give a thought to designing a website for your own website, chances are high that you think of a website with the bells and whistles – wonderful images with flash, viewing audio – the works! But, uncertain to you personally, these factors may very well destroy your enterprise because what shows up appealing on the face is detractive in terms of search results positioning.
In case your website has these factors, it is immediately downgrade to a considerably lower rank even if your unique content is relevant and you’re utilizing leading edge technology.
According to a recent survey, which showed some dreadful results, one out of every ten website designers believes that SEO is not their business. And more seriously, more than 24% of website designers don’t have the idea concerning what SEO is! Before discovering the causes to choose from an SEO friendly website design, it is necessary to know what this is all about.
You notice major search engines engage automated ‘web spiders’ to crawl via web pages. Each of these ‘web spiders’ collect information and facts relating to the website. The data they glean enables them to figure out the relevance of a website for particular keyword phrases. Now, you should understand that these are also automated software that has been hinted to crawl via websites in a certain method. They put the information they gather in a folder. Therefore, when a user requests a keyword, the search engine dips into this folder and displays sites based on relevance. Sites that ‘seem’ more related come out on the top, while those which are not, end up at the bottom.
Despite the fact that design factors alone are not liable for dismal search engine rankings, they also play a necessary role.
It doesn’t matter if you are a professional website designer or perhaps a company owner, it is recommended to know why you must always look for an SEO friendly website design.

Advantages Of Seo Optimized Website Designing : 


  •   A Search Engine Optimized  website design is a great way to take care of traffic form the major search engines. If major search engines are not pleased with your design and layout, you can’t expect more traffic either from referral back link and direct traffic.
  •   Research illustrate that about 45-65% of web traffic to any website comes from major search engines. Thus, a website design that isn’t search engine friendly is washing its hands off this amazing traffic volume.
  •   Usually, an SEO friendly website design is likewise incredibly easy to use. Thus, making sure you use appropriate code of HTML, goal adequate keywords via content and meta tags, employ ALT tags, utilize proper links etc, get the website quick to download and easier for the user.
  •  An SEO friendly website talks good quality webpage design. If you’re a firm with some more standing, like the ones of webpage you have got impacts your company value.
  • Google robots and the other search engine robots can easily crawl your blog if the site is well designed

Thursday, June 14, 2012

How To Recover From Google's Panda Effect

Google Panda is Google's latest search algorithm. Introduced last year, the algorithm was created to a draw a line between awesome sites and not-so-good sites. This update ranks all websites according to the quality and quantity of the quality content on present on them. So, lets say you had a website about gorgeous girls, it will obviously get more hits and thus be considered a hit by Google Panda. On the same end, if you had a website about how sexy George W. Bush is, it wouldn't get as many visitors as you'd like and be ranked below-the-belt website (!).

Where the update itself needs a little bit of getting used to, it actually is pretty handy. For one, the big companies won't be listed at the top of the search just for their unbeatable SEO tactics. Secondly, quality content will be prioritised and show on the top of the search engine driving more traffic into your website.

Now, Google Panda is going to kick your butt out of its community if you have:

1. Copied or Duplicate Content

2. Outdated or Idiotic Content which the Users find Irrelevant

3. Grammatical and Spelling Mistakes

4. Automatically Generated Content

5. Frivolous SEO Content

6. Over Optimization


Make one mistake and your website is going to be penalized for it now. You have entered the Rabbit's Hole and it goes much deeper than you think. This, I would like to think, is a plus for quality bloggers. We feel sorry for all the spammers out there who had dreams to make it big through copying someone else's content and posting outdated material thinking it didn't matter as long as they got paid.

Alright, lets get to the "Fixing and Fighting" part of Google Panda. We have a few solutions for you regarding your page ranking and Google Panda. Let's check them out below:

-Release The Demon Inside: 'Copy and Paste' Trend Won't Work Any more:

Give your brain a little nudge, or perhaps a light pinch, doing this could be sufficient to reduce the numbness that you have provided it with for so many years. If that doesn't work to wake it up, then might as well give up your dream to become a successful blogger. Unleash the dragon and write with your mind and heart. Produce quality content and write it in your own (intelligible) words. Make your posts interesting, worth-the-while, grammatically correct, spelling mistakes will not be tolerated (yeah, we are back to grade school).

Keep the above suggestion in mind and write at least every once a week. Update your blog/website and make sure all your links are in working condition. Do not leave your site dormant. It will bring you down where all the sucky sites reside.

Write lengthy content, add videos, images, etc to make it more attractive and easy-to-understand to your readers and followers. Know what your followers are looking for and give them exactly that and more.


-Speed Counts:

Optimize your website to higher, more desirable speeds. Make it user-friendly and relevant to your topic. Google likes websites that are in tune with their soul.


-Duplicated Content in a BIG 'NO':

The concept is that when you duplicate or copy some content you are technically 'stealing' it. Google Panda is working very well against the theft or original content so you should remove all the data you have ever stolen from someone and vow never to do it again because the punishment to doing so wont be a few spanks, it will be being dragged down the page ranking chain. If you know what you want to write, then write it the way you feel like it should be written. Don't be a sore loser.


-Use Relevant Keywords:

We can not impress this point enough, you need to know that the keywords you use can either bring you to the top of the food chain or get you eaten brutally and spat out by a bunch of no-good wannabes. Use the most relevant keywords according to your website and your blog. It will help you get the most traffic from the internet users. If you don't know how to use keywords to your benefit, please follow this link.


-Link You Blog/Website to the Social Media (Twitter, Facebook etc):


By using these social websites, you will drive more traffic into your website. Your followers/subscribers will follow your posts and in return, Google will start considering you a legit blogger. If you don't know how to drive traffic to your website through Twitter, please click here.


-Offer Free Promotions:

People like free stuff, we all know that. All website owners should take advantage of this weakness of mankind. Offer free stuff like ebooks, music and video downloads etc and you will instantly drive more traffic into your website.

These suggestions may look tough and most of you must be thinking about getting out while you still can but trust us, if you really are serious about what you do then this is the only way to beat the Panda Effect. You need to start working on your website, give it time, pamper it, love it and Google Panda will give you the results.

Until then, Happy Panda-Kick-Ass-ing Everyone! :)

Wednesday, June 13, 2012

Add A Comment Bubble Just Next To Blogger Post Titles


If you want to show the number of comments just next to your blog post tiles then comment-bubble is a best way to show number of comments to that particular post in a small bubble icon.This little bubble will also increase the number of comments on your blog,because by clicking on the bubble your readers can directly access the comment-form of that post.Also you can add this in two easiest ways,just follow below steps carefully and you will easily add this to your blog.


How To Add Comment Bubble Just Next To Post Title?


  1. Go to Blogger Dashboard > Template
  2. Take a backup of your template
  3. Click On Edit HTML
  4. Hit Proceed
  5. Check Expand Widget Templates chechbox.
  6. Find below code in your template

]]></b:skin>


add below code just above it

.comment-bubble {
float: right;
width: 48px;
height: 48px;
background: url(https://blogger.googleusercontent.com/img/b/R29vZ2xl/AVvXsEjJqDVhpKpjlE7WXqm-9i_ctNW7Fr3WfbtcoVHil4OJDz6dw6WFayEqJl7E6lCnlIqFM-VlbfMiUjbljHVwnQllKmuNCxqUCGuaomZark2K_4K14JpbfGyPQ-knMzOQ8AGoVvnqCnrS3LEh/s1600/helperblogger.com-commentbubble.png) no-repeat;
font-size: 18px;
float: right;
margin-top: -15px;
margin-right: 2px;
text-align: center;
position: float;
text-align: center;
}


Now find for below code in your template

<b:if cond='data:post.link'>


replace it with below piece of code,

<b:if cond='data:post.allowComments'>
<a class='comment-bubble' expr:href='data:post.addCommentUrl' expr:onclick='data:post.addCommentOnclick'><data:post.numComments/></a>
</b:if>
<b:if cond='data:post.link'>

Now take a preview of your template,if you want to adjust the position of comment bubble then you can change the above CSS values as you need.When you feel that everything is ok then save your template.You can also replace the bubble with your own bubble,just replace the URL of bubble with your own bubble URL.

Add Image Just Next To Blogger Post Titles

In this post we are sharing a cool hack which will add an your own image,favicon or whatever you choose just next to your blog's post titles.You can also add your own profile pic. it will give more personal touch to your blog.To apply this hack you just have to delete and put some code in your template.If you want to see live preview of the hack,then see the image below,


Now lets see how to apply this hack,


How To Add Image Just Next To Blogger Post Titles?


I have tried my best to keep this tutorial easy as easy as possible.For better understanding I am dividing this tutorial in three parts,but you just have to follow any one post because it depends upon the tag which you are using as post title.

  • Part 1: Finding the tag which you are using as Post Title
  • Part 2: For those who are using H3 tag as a Post Title
  • Part 2: For those who are using H2 tag as a Post Title


Part 1: Finding the tag which you are using as Post Title


  1. First go to Blogger Dashboard > Template
  2. Download a copy of your template
  3. Click Edit HTML
  4. Hit Proceed
  5. Check Expand Widget Template checkbox
  6. Find below code in your template


1
<h3 class='post-title entry-title'>

Now if you found above code in your template then you are using H3 tag as a post title.Now only follow second part of this tutorial

If you can't find above code then find for this one

1
<h2 class='post-title entry-title'>

If you found above code in your template then you are using H2 tag as a post title.Now only follow third part of this tutorial.

Part 2: For those who are using H3 tag as a Post Title


  1. First go to Blogger Dashboard > Template
  2. Click Edit HTML
  3. Hit Proceed
  4. Check Expand Widget Template checkbox
  5. Find below piece of code in your template


1
2
3
4
5
6
7
8
9
10
11
12
13
14
15
16
17
18
19
20
<b:includable id='post' var='post'>
  <div class='post hentry'>
    <a expr:name='data:post.id'/>
    <b:if cond='data:post.title'>
      <h3 class='post-title entry-title'>
      <b:if cond='data:post.link'>
        <a expr:href='data:post.link'><data:post.title/></a>
      <b:else/>
        <b:if cond='data:post.url'>
          <b:if cond='data:blog.url != data:post.url'>
            <a expr:href='data:post.url'><data:post.title/></a>
          <b:else/>
            <data:post.title/>
          </b:if>
        <b:else/>
          <data:post.title/>
        </b:if>
      </b:if>
      </h3>
    </b:if>

replace it with below code, (be careful while deleting,only replace above exact code)

1
2
3
4
5
6
7
8
9
10
11
12
13
14
15
16
17
18
19
20
21
22
23
24
25
26
27
28
29
30
<b:includable id='post' var='post'>
  <div class='post hentry'>
    <a expr:name='data:post.id'/>
    <b:if cond='data:post.title'>
    <table><tr>
     <td class='ssybyposttitle'>
      <img src='https://blogger.googleusercontent.com/img/b/R29vZ2xl/AVvXsEjKLcPTGM_GucEpZgGsEpUO4d3qAxrwXMrmNDpZdCmbksBH-9k7yHGOU6EDgjztDGxoCMNt9hRqQPl4NJdgn0RVBBFzua3bTHXr2LXQZqWqPtaIXabyk8TJk6RzYG8g8YyaF6esTb7nkg0/s1600/helperblogger-pencil.png'/></td>
     <td><h3 class='post-title entry-title'>
      <b:if cond='data:post.link'>
        <a expr:href='data:post.link'><data:post.title/></a>
      <b:else/>
        <b:if cond='data:post.url'>
          <b:if cond='data:blog.url != data:post.url'>
            <a expr:href='data:post.url'><data:post.title/></a>
          <b:else/>
            <data:post.title/>
          </b:if>
        <b:else/>
          <data:post.title/>
        </b:if>
      </b:if>
      </h3>
     </td>
    </tr></table>
     <style>
       h3.post-title {
       margin: 0px !important;
       }
     </style>
    </b:if>

Now replace the image URL in above highlighted line with your own image URL (image should be less than 64X64 pixels)

Part 3: For those who are using H2 tag as a Post Title


  1. First go to Blogger Dashboard > Template
  2. Click Edit HTML
  3. Hit Proceed
  4. Check Expand Widget Template checkbox
  5. Find below piece of code in your template


1
2
3
4
5
6
7
8
9
10
11
12
13
14
15
16
17
18
19
20
<b:includable id='post' var='post'>
  <div class='post hentry'>
    <a expr:name='data:post.id'/>
    <b:if cond='data:post.title'>
      <h2 class='post-title entry-title'>
      <b:if cond='data:post.link'>
        <a expr:href='data:post.link'><data:post.title/></a>
      <b:else/>
        <b:if cond='data:post.url'>
          <b:if cond='data:blog.url != data:post.url'>
            <a expr:href='data:post.url'><data:post.title/></a>
          <b:else/>
            <data:post.title/>
          </b:if>
        <b:else/>
          <data:post.title/>
        </b:if>
      </b:if>
      </h2>
    </b:if>

replace it with below piece of code,

1
2
3
4
5
6
7
8
9
10
11
12
13
14
15
16
17
18
19
20
21
22
23
24
25
26
27
28
29
30
<b:includable id='post' var='post'>
  <div class='post hentry'>
    <a expr:name='data:post.id'/>
    <b:if cond='data:post.title'>
    <table><tr>
     <td class='ssybyposttitle'>
      <img src='https://blogger.googleusercontent.com/img/b/R29vZ2xl/AVvXsEjKLcPTGM_GucEpZgGsEpUO4d3qAxrwXMrmNDpZdCmbksBH-9k7yHGOU6EDgjztDGxoCMNt9hRqQPl4NJdgn0RVBBFzua3bTHXr2LXQZqWqPtaIXabyk8TJk6RzYG8g8YyaF6esTb7nkg0/s1600/helperblogger-pencil.png'/></td>
     <td><h2 class='post-title entry-title'>
      <b:if cond='data:post.link'>
        <a expr:href='data:post.link'><data:post.title/></a>
      <b:else/>
        <b:if cond='data:post.url'>
          <b:if cond='data:blog.url != data:post.url'>
            <a expr:href='data:post.url'><data:post.title/></a>
          <b:else/>
            <data:post.title/>
          </b:if>
        <b:else/>
          <data:post.title/>
        </b:if>
      </b:if>
      </h2>
     </td>
    </tr></table>
     <style>
       h2.post-title {
       margin: 0px !important;
       }
     </style>
    </b:if>

Now replace the image URL in above highlighted line with your own image URL (image should be less than 64X64 pixels)